Something went wrong... Please try again.
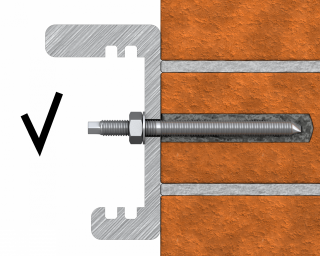
R-STUDS Metric Threaded Rods - Steel Class 1.4529 HCR, Flat Head
Threaded rod made out of an austenitic special steel 1.4529 HCR classified in the highest corrosion resistance class


Features and benefits
- Stainless steel 1.4529 HCR is characterized by its high resistance to local corrosion phenomena, such as crevice corrosion, pitting, or chlorine-induced stress corrosion cracking
- It demonstrates excellent mechanical properties and can be used in a wide temperature range
- In contact with sulphuric or phosphoric acid, or chlorides and salts, it offers excellent resilience and resistance to wear
- High-performance bonded anchors offer high load-bearing capacities
- Can be post-installed through fixture in some cases. (Consult technical advisory service)
- Flat head for quick manual installation without a setting tool
Product information
Size |
Product Code |
Anchor |
Fixture |
|||||
Diameter |
Length |
Max. thickness tfix for: |
Hole diameter |
Max. thickness tfix for: |
||||
d |
L |
hnom, 6d |
hnom, 12d |
df |
hnom,min |
hnom, 12d |
||
[mm] |
[mm] |
[mm] |
[mm] |
[mm] |
[mm] |
[mm] |
||
M8 |
R-STUDS-08110HCRFL |
8 |
110 |
52 |
4 |
9 |
40 |
4 |
M10 |
R-STUDS-10130HCRFL |
10 |
130 |
58 |
- |
12 |
48 |
- |
M12 |
R-STUDS-12160HCRFL |
12 |
160 |
73 |
1 |
14 |
65 |
1 |
M16 |
R-STUDS-16190HCRFL |
16 |
190 |
75 |
- |
18 |
71 |
- |
M20 |
R-STUDS-20260HCRFL |
20 |
260 |
117 |
- |
22 |
117 |
- |
Applications
- Shipbuilding
- Offshore technology
- Swimming pool technology
- Plants in the chemical industry
- Heat exchangers and evaporators
- Flue gas desulphurization plants
- Tanks for aggressive chemical products
- Tunnel construction
Installation guide
- Drill hole to the required diameter and depth for stud size being used.
- Clean the hole thoroughly with hand pump and hole brush
- If required, insert the mesh sleeve into position
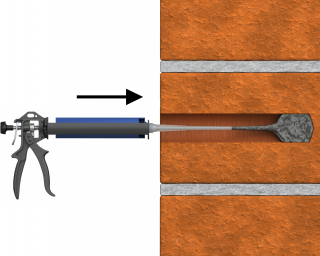
- Fill hole with the required resin to the recommended fill level. (Follow the relevant instructions for the resin product)
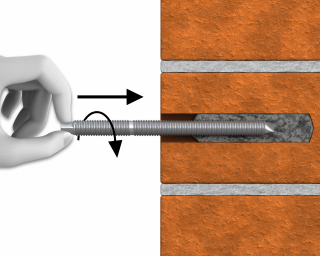
- Insert the threaded stud slowly and with a slight twisting motion, until the required embedment depth is reached
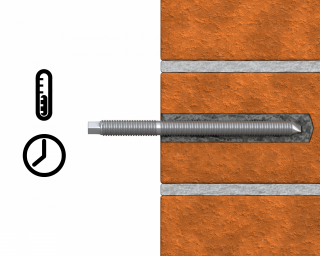
- Leave undisturbed until curing time of resin has elapsed
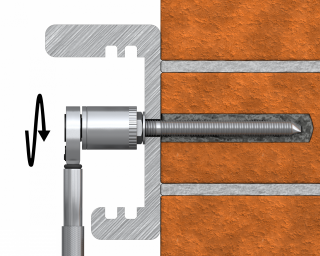
- Attach fixture and tighten the nut to the required installation torque
Contact us to get information about product availability and its price


